
STEP 1
LAYING OUT THE BAG
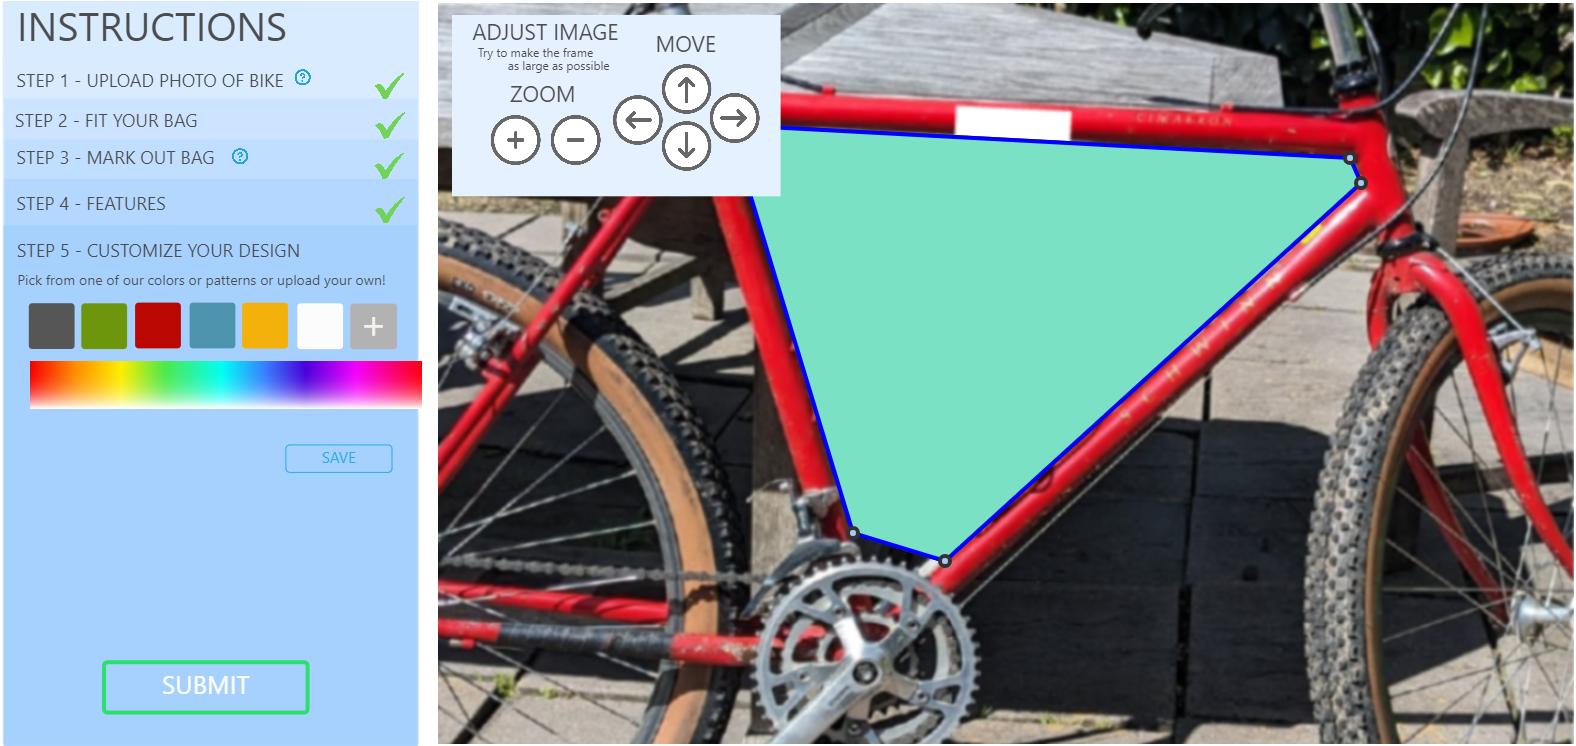
The process start with the Wompy Design Software to create the style of bag and fit it to your bike frame. We will take a photo of your bike, layout the shape of your bag, upload a graphic or pick a default pattern and then submit your design.

STEP 2
LASER CUT FABRIC
Once we have the design files laid out, we will take these files and cut out the fabric using the laser cutter. This will give us each of the blank panels to which we will apply our fabric pattern.

STEP 3
TRANSFER PATTERN
Through a process called Dye Sublimation, we will add color to our fabric. First, we print off the design onto special transfer paper, then we apply heat to the paper to transfer it to the fabric.

STEP 4
SEW GUSSETS
The first step in sewing the bag is for us to sew together all the tabs that we use to lace the bag onto the frame. These sections also have a rigid piece of fabric inside them to help give structure to the bag.

STEP 5
SEWING ZIPPERS
The Zippers are the trickiest part to sew, but look quite nice when done right. We’ll use the laser cut slot in the fabric to position the zipper.
STEP 6
FINAL BAG ASSEMBLY
The final step is to assemble all the panels together to form the final bag. We take the gusset panels and sew them to our front and back panels to form our complete bag.